Applying Boat Decals and Graphics
August 25, 2017
Replacing worn, torn, or faded hull graphics and boat decals is an easy way to spruce up your boat. Though it's an easy project, it does take time and careful attention. This isn't a task to take on in windy or wet weather, or if you're pressed for time. With a few simple tools and vinyl graphics, you can have a boat that looks almost like new.
First, remove the old vinyl graphics. A gentle approach is essential here, as using the wrong kind of tool or working too quickly can damage your boat's finish. You can use a hair dryer or heat gun to warm the vinyl before trying to peel it off; a few minutes of heat should do the job.
[caption id="attachment_465" align="aligncenter" width="274"] Vinyl Approach[/caption]
Metal tools or razor blades can easily gouge your gelcoat, so use a plastic spatula or putty knife for gentle, careful scraping. You can also find special wheels at auto supply stores that are used with a power drill to remove graphics and pinstripe. Follow the manufacturer's instructions and wear eye protection when using these tools. Once the decals are off, remove any sticky residue with acetone, alcohol, or a product like Goo Gone. All trace of adhesive needs to be gone before you put new graphics on.
[caption id="attachment_466" align="aligncenter" width="259"]
Vinyl Approach[/caption]
Metal tools or razor blades can easily gouge your gelcoat, so use a plastic spatula or putty knife for gentle, careful scraping. You can also find special wheels at auto supply stores that are used with a power drill to remove graphics and pinstripe. Follow the manufacturer's instructions and wear eye protection when using these tools. Once the decals are off, remove any sticky residue with acetone, alcohol, or a product like Goo Gone. All trace of adhesive needs to be gone before you put new graphics on.
[caption id="attachment_466" align="aligncenter" width="259"]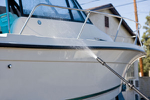 Luxe Wash[/caption]
Give your boat a good cleaning with water and a detergent product. If your boat shows a color difference where the old decals were peeled away, try a rubbing compound to remove these "ghost" marks. Some ambitious DIYers with badly-marked hulls report good results with careful wet sanding, starting with 600 grit and working up to 2000, followed with compound and polish. This is a huge job, but your boat will look like new. Whatever method you use to clean your boat, let it dry thoroughly.
Now we're ready to position the new graphics. You'll need masking tape, a grease pencil, and a tape measure. Use the tape measure to find the center of the area where you want the new decal to go, and mark it with a piece of tape. Find the center of your decal by carefully folding it in half (don't crease it) and marking the fold with your pencil.
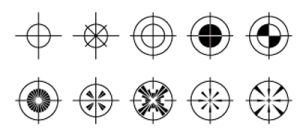
Tape the decal (or, if you're using a graphics kit, the first decal of the set) into position. Use a grease pencil to mark the decal, continuing the mark onto the hull, in several places around the graphic; you'll use these marks to line up your decal when it's time to apply it. Alternatively, you can use tabs of masking tape to mark the graphic's position. If you're installing a graphics kit, use the registration marks to line up the pieces with each other; these look like plus signs or target sights.
Luxe Wash[/caption]
Give your boat a good cleaning with water and a detergent product. If your boat shows a color difference where the old decals were peeled away, try a rubbing compound to remove these "ghost" marks. Some ambitious DIYers with badly-marked hulls report good results with careful wet sanding, starting with 600 grit and working up to 2000, followed with compound and polish. This is a huge job, but your boat will look like new. Whatever method you use to clean your boat, let it dry thoroughly.
Now we're ready to position the new graphics. You'll need masking tape, a grease pencil, and a tape measure. Use the tape measure to find the center of the area where you want the new decal to go, and mark it with a piece of tape. Find the center of your decal by carefully folding it in half (don't crease it) and marking the fold with your pencil.
Tape the decal (or, if you're using a graphics kit, the first decal of the set) into position. Use a grease pencil to mark the decal, continuing the mark onto the hull, in several places around the graphic; you'll use these marks to line up your decal when it's time to apply it. Alternatively, you can use tabs of masking tape to mark the graphic's position. If you're installing a graphics kit, use the registration marks to line up the pieces with each other; these look like plus signs or target sights.
 Overlap the registration marks to position each graphic as designed. Tape each in place, number it, and mark its position with your grease pencil or tape. Carefully remove the graphics from the boat, making sure not to smudge your pencil marks or displace your tape.
Before you install your graphics, be sure your surface is scrupulously clean. Anything - dust, fuzz, hair - that's on the hull will stick to the decal. Use a lint-free towel (and glass cleaner, if necessary) to get the surface squeaky-clean and dustless.
Starting with your first graphic, carefully peel off the wax paper. For peel-and-stick decals, align your pencil marks and lightly press the graphic against the hull, using your masking tape at the edges of the backing paper if you need it. Starting at the middle of the graphic, use your squeegee to press out air bubbles and adhere the decal to the boat. Let it sit for about 30 minutes, and carefully peel off the backing paper. Smooth out any last bubbles with your squeegee, and admire your handiwork.
If your graphics call for a wet application, you'll need a spray bottle of water with a few drops of dish soap in it. Once you've peeled off the wax paper, spritz your graphic and the application site with this soapy water. Place the graphic into position and press it against the hull. Rub the graphic from the center out with your squeegee or spatula, removing air bubbles and wrinkles. Go over the graphic with a soft, lint-free towel to dry it, then reapply your squeegee to squeeze out any last air bubbles or water trapped under the decal. Let the graphic dry for an hour, then very carefully and slowly peel off the backing paper, pulling it back at a 180-degree angle to avoid pulling up the graphic. Go over the graphic with your towel again and give it one last squeegee treatment. You're done!
Overlap the registration marks to position each graphic as designed. Tape each in place, number it, and mark its position with your grease pencil or tape. Carefully remove the graphics from the boat, making sure not to smudge your pencil marks or displace your tape.
Before you install your graphics, be sure your surface is scrupulously clean. Anything - dust, fuzz, hair - that's on the hull will stick to the decal. Use a lint-free towel (and glass cleaner, if necessary) to get the surface squeaky-clean and dustless.
Starting with your first graphic, carefully peel off the wax paper. For peel-and-stick decals, align your pencil marks and lightly press the graphic against the hull, using your masking tape at the edges of the backing paper if you need it. Starting at the middle of the graphic, use your squeegee to press out air bubbles and adhere the decal to the boat. Let it sit for about 30 minutes, and carefully peel off the backing paper. Smooth out any last bubbles with your squeegee, and admire your handiwork.
If your graphics call for a wet application, you'll need a spray bottle of water with a few drops of dish soap in it. Once you've peeled off the wax paper, spritz your graphic and the application site with this soapy water. Place the graphic into position and press it against the hull. Rub the graphic from the center out with your squeegee or spatula, removing air bubbles and wrinkles. Go over the graphic with a soft, lint-free towel to dry it, then reapply your squeegee to squeeze out any last air bubbles or water trapped under the decal. Let the graphic dry for an hour, then very carefully and slowly peel off the backing paper, pulling it back at a 180-degree angle to avoid pulling up the graphic. Go over the graphic with your towel again and give it one last squeegee treatment. You're done!
Vinyl Approach[/caption]
Metal tools or razor blades can easily gouge your gelcoat, so use a plastic spatula or putty knife for gentle, careful scraping. You can also find special wheels at auto supply stores that are used with a power drill to remove graphics and pinstripe. Follow the manufacturer's instructions and wear eye protection when using these tools. Once the decals are off, remove any sticky residue with acetone, alcohol, or a product like Goo Gone. All trace of adhesive needs to be gone before you put new graphics on.
[caption id="attachment_466" align="aligncenter" width="259"] Luxe Wash[/caption]
Give your boat a good cleaning with water and a detergent product. If your boat shows a color difference where the old decals were peeled away, try a rubbing compound to remove these "ghost" marks. Some ambitious DIYers with badly-marked hulls report good results with careful wet sanding, starting with 600 grit and working up to 2000, followed with compound and polish. This is a huge job, but your boat will look like new. Whatever method you use to clean your boat, let it dry thoroughly.
Now we're ready to position the new graphics. You'll need masking tape, a grease pencil, and a tape measure. Use the tape measure to find the center of the area where you want the new decal to go, and mark it with a piece of tape. Find the center of your decal by carefully folding it in half (don't crease it) and marking the fold with your pencil.
Tape the decal (or, if you're using a graphics kit, the first decal of the set) into position. Use a grease pencil to mark the decal, continuing the mark onto the hull, in several places around the graphic; you'll use these marks to line up your decal when it's time to apply it. Alternatively, you can use tabs of masking tape to mark the graphic's position. If you're installing a graphics kit, use the registration marks to line up the pieces with each other; these look like plus signs or target sights.
Overlap the registration marks to position each graphic as designed. Tape each in place, number it, and mark its position with your grease pencil or tape. Carefully remove the graphics from the boat, making sure not to smudge your pencil marks or displace your tape.
Before you install your graphics, be sure your surface is scrupulously clean. Anything - dust, fuzz, hair - that's on the hull will stick to the decal. Use a lint-free towel (and glass cleaner, if necessary) to get the surface squeaky-clean and dustless.
Starting with your first graphic, carefully peel off the wax paper. For peel-and-stick decals, align your pencil marks and lightly press the graphic against the hull, using your masking tape at the edges of the backing paper if you need it. Starting at the middle of the graphic, use your squeegee to press out air bubbles and adhere the decal to the boat. Let it sit for about 30 minutes, and carefully peel off the backing paper. Smooth out any last bubbles with your squeegee, and admire your handiwork.
If your graphics call for a wet application, you'll need a spray bottle of water with a few drops of dish soap in it. Once you've peeled off the wax paper, spritz your graphic and the application site with this soapy water. Place the graphic into position and press it against the hull. Rub the graphic from the center out with your squeegee or spatula, removing air bubbles and wrinkles. Go over the graphic with a soft, lint-free towel to dry it, then reapply your squeegee to squeeze out any last air bubbles or water trapped under the decal. Let the graphic dry for an hour, then very carefully and slowly peel off the backing paper, pulling it back at a 180-degree angle to avoid pulling up the graphic. Go over the graphic with your towel again and give it one last squeegee treatment. You're done!